
Das hier ist mein Lieblingsrezept für ein deutsches Roggenmischbrot.
Roggenmischbrot
- Stockgare: 3-4 Stunden, Stückgare: 2 Stunden
- 1 Laib@ 774g
- Schwierigkeit: Einfach. 70% Hydratisierung
- ZUTATEN
- 200g Vollkornroggenmehl
- 150g Weizenmehl
- 50g Brotmehl
- 265g Wasser
- 9g Salz
- 100g aktiver, reifer Sauerteigstarter
- ANLEITUNG
- Teig mischen.
- Abdecken und 3 bis 4 Stunden gehen lassen.
- Laib formen.
- Abdecken und 2 Stunden gehen lassen, oder über Nacht in den Kühlschrank stellen.
- Laib scoren (Oberfläche einritzen).
- Bei 240 Grad Celsius backen.
Dieses Brot ist überhaupt nicht schwer zu machen. Das einzig Herausfordernde ist, alles gründlich zu vermischen. Ich mache oft gleich Teig für drei Brote auf einmal – das von Hand zu kneten, ist bei Roggensauerteig schon ein kleines Workout! Da kann ein Mixer wirklich hilfreich sein. Unten findest du die Schritt-für-Schritt-Anleitung mit Bildern. Ich habe auch ein Video dazu gedreht, in dem ich zeige, wie ich das Brot vom ersten Rühren bis zum fertigen Laib backe – das findest du auf YouTube.
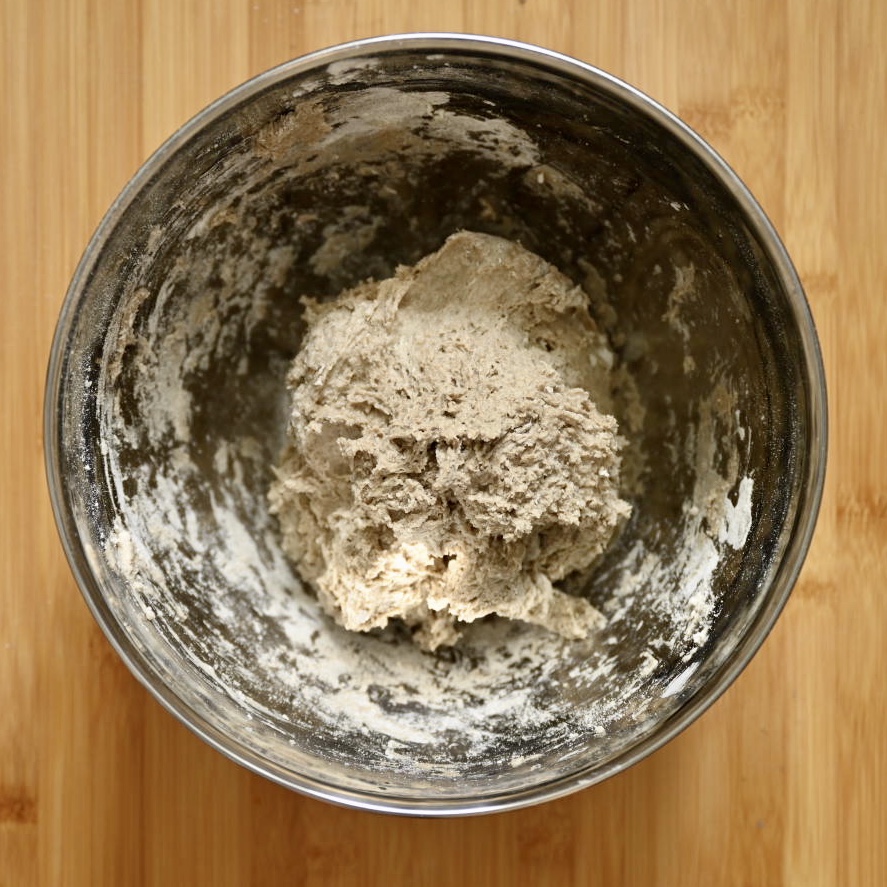
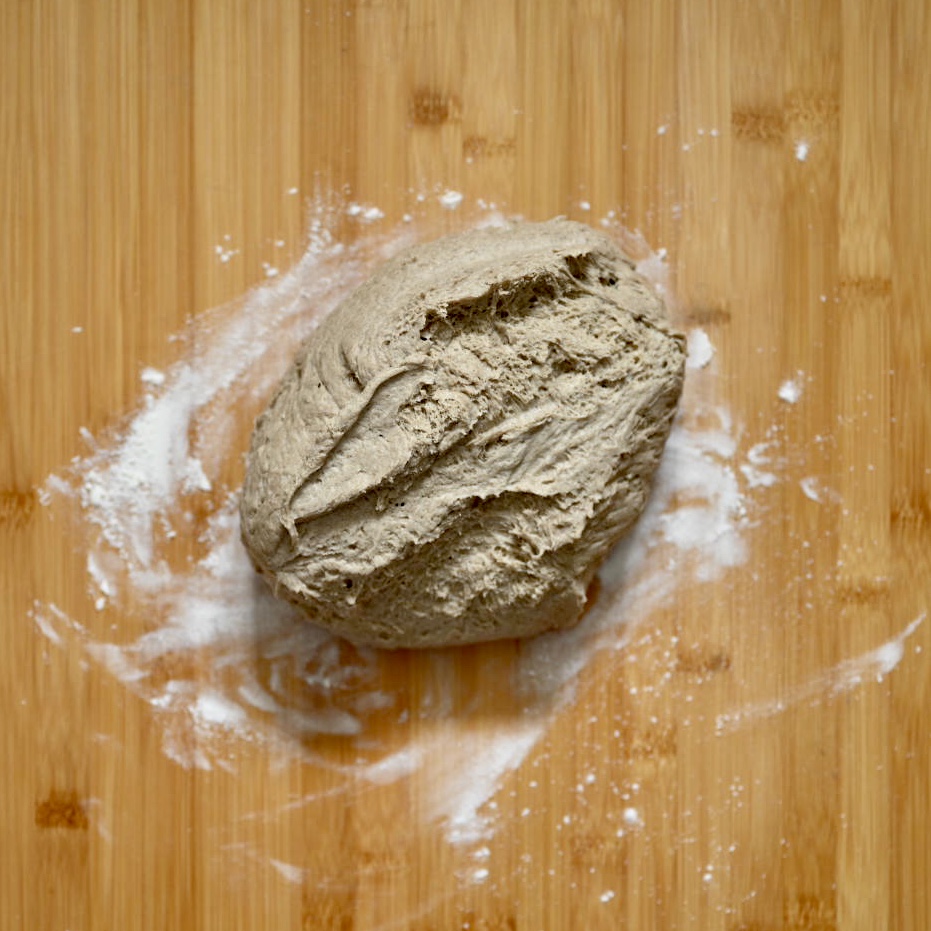
1. Teig mischen.
Mische zuerst das Wasser mit dem Sauerteig, dann gib das Mehl und das Salz dazu. Am Ende sollte der Teig homogen sein – der Sauerteigstarter und das Salz müssen gleichmäßig verteilt sein und es sollten keine trockenen Mehlreste mehr zu sehen sein. Decke deine Schüssel ab.
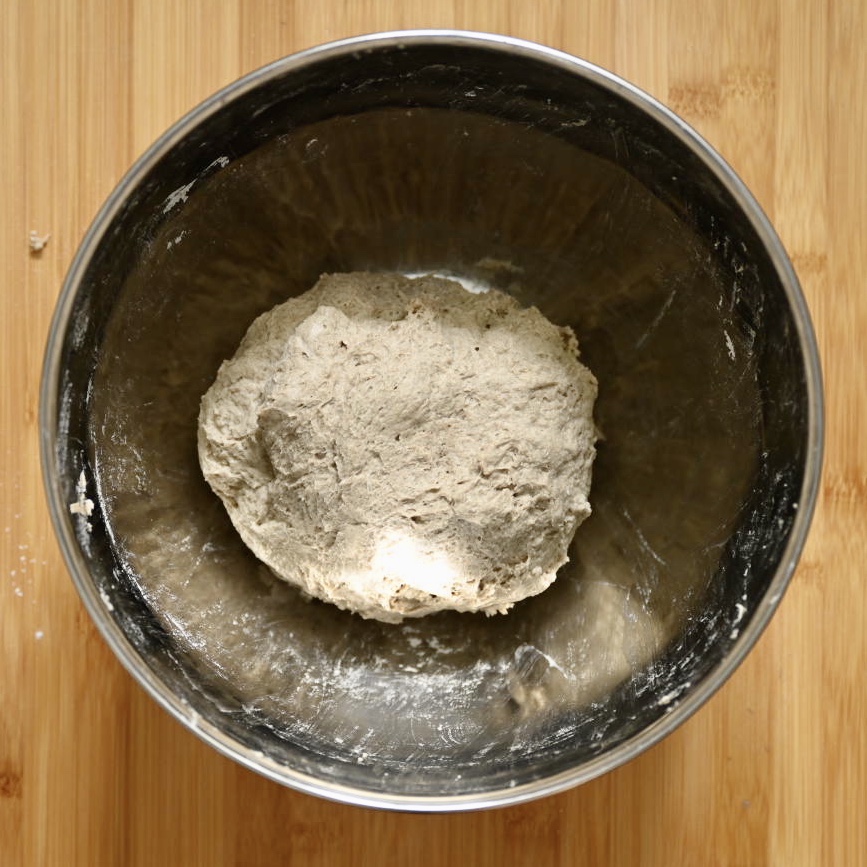
2. 3 bis 4 Stunden lang gehen lassen.
Die Gehzeit hängt SEHR von der Temperatur und der Triebkraft deines Starters ab. Aber Roggensauerteig ist weniger empfindlich als andere Teige – mach dir also nicht zu viele Sorgen. Ich habe festgestellt, dass 3 bis 4 Stunden bei 25 °C ausreichen, damit der Teig schön aufgeht.
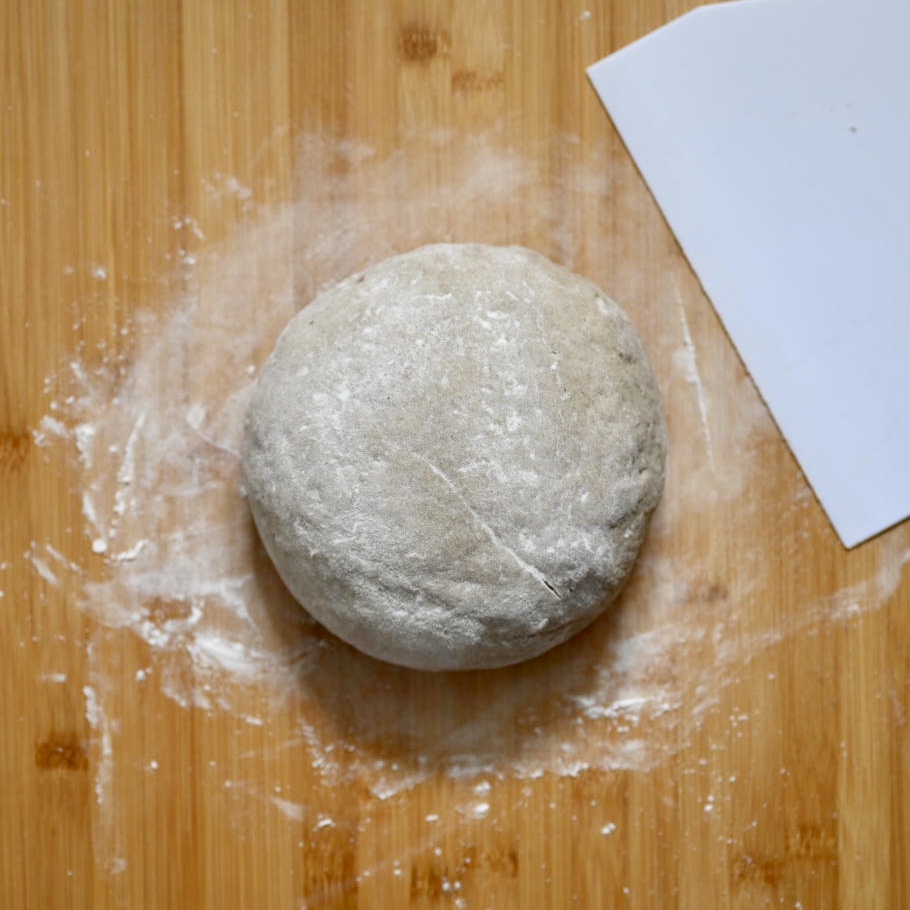
3. Laib formen.
Stürze den Teig auf deine bemehlte Arbeitsfläche. Wenn du mehr als ein Brot machst, teile ihn jetzt. Forme dann einen schönen runden Laib – das ist so einfach wie Knete zu einer Kugel zu rollen. Vergiss, was du über das Formen von Weizenteigen weißt. Roggen ist viel unkomplizierter. Bemehle deinen Laib großzügig und lege ihn in ein Gärkörbchen.
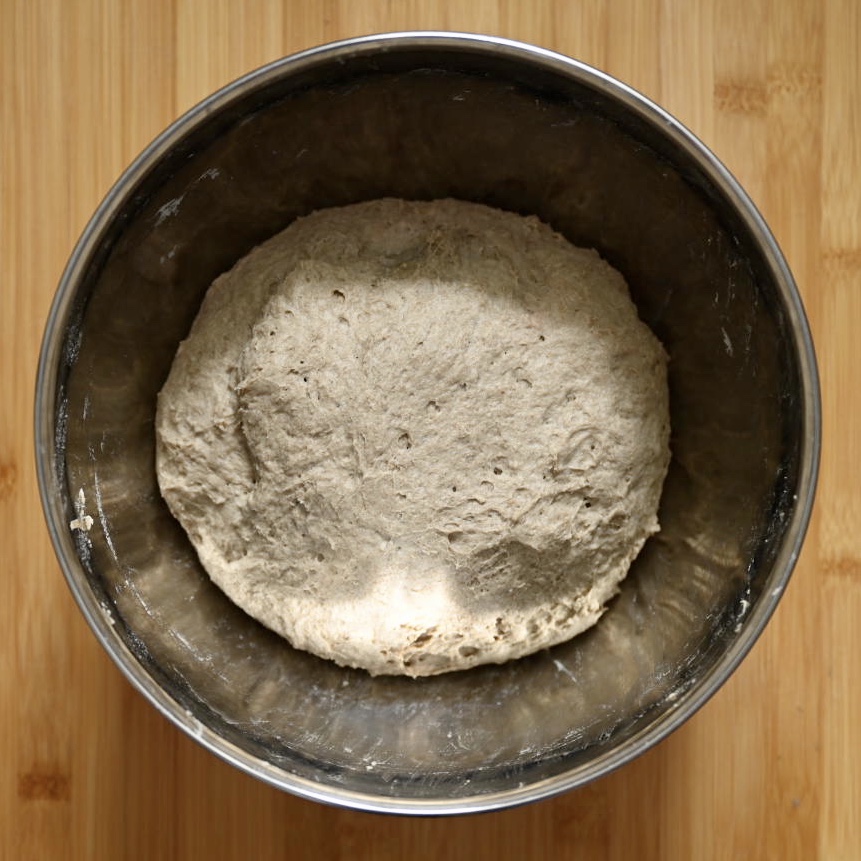
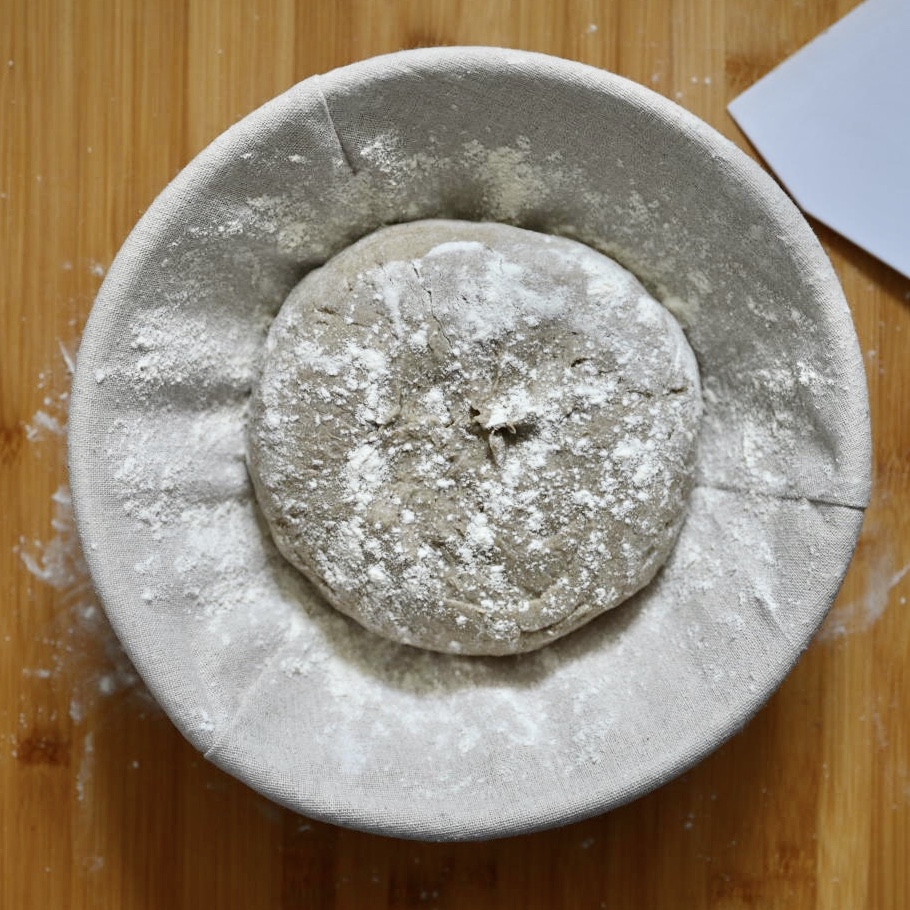
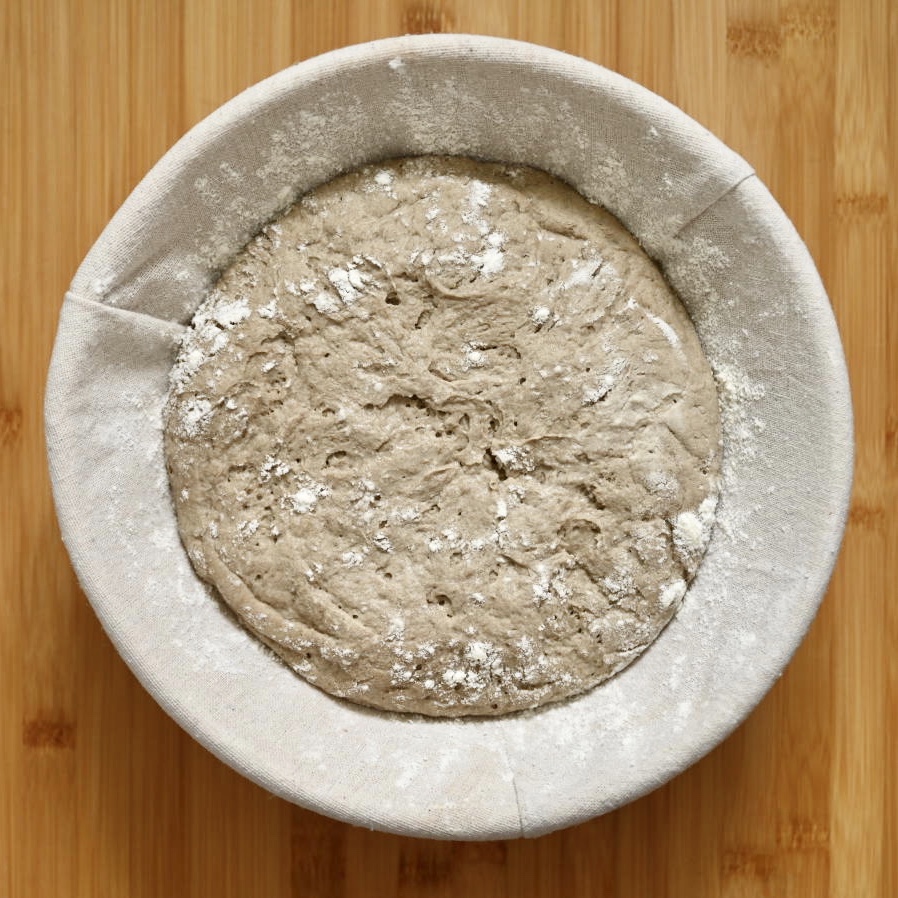
4. 2 Stunden lang gehen lassen, oder über Nacht in den Kühlschrank stellen.
Die genaue Gehzeit hängt von der Temperatur ab. Warte, bis der Laib deutlich an Volumen zugenommen hat.
Oder du stellst den Teig einfach in den Kühlschrank für eine Nacht.
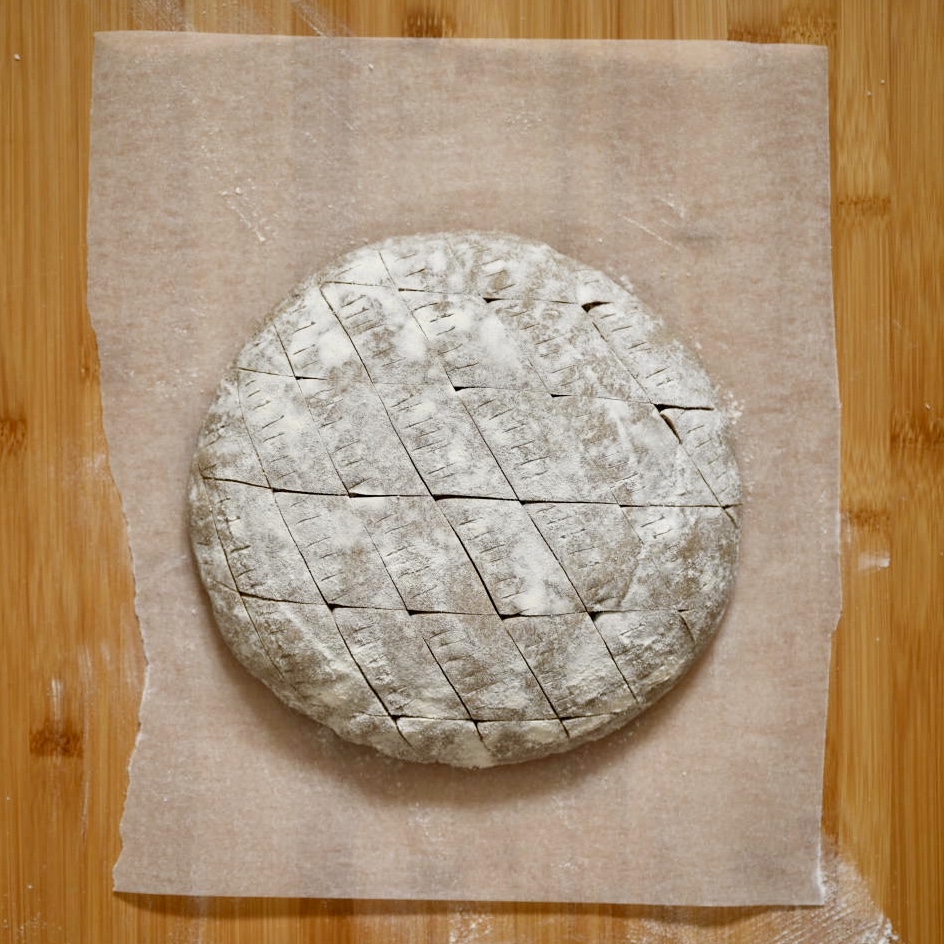
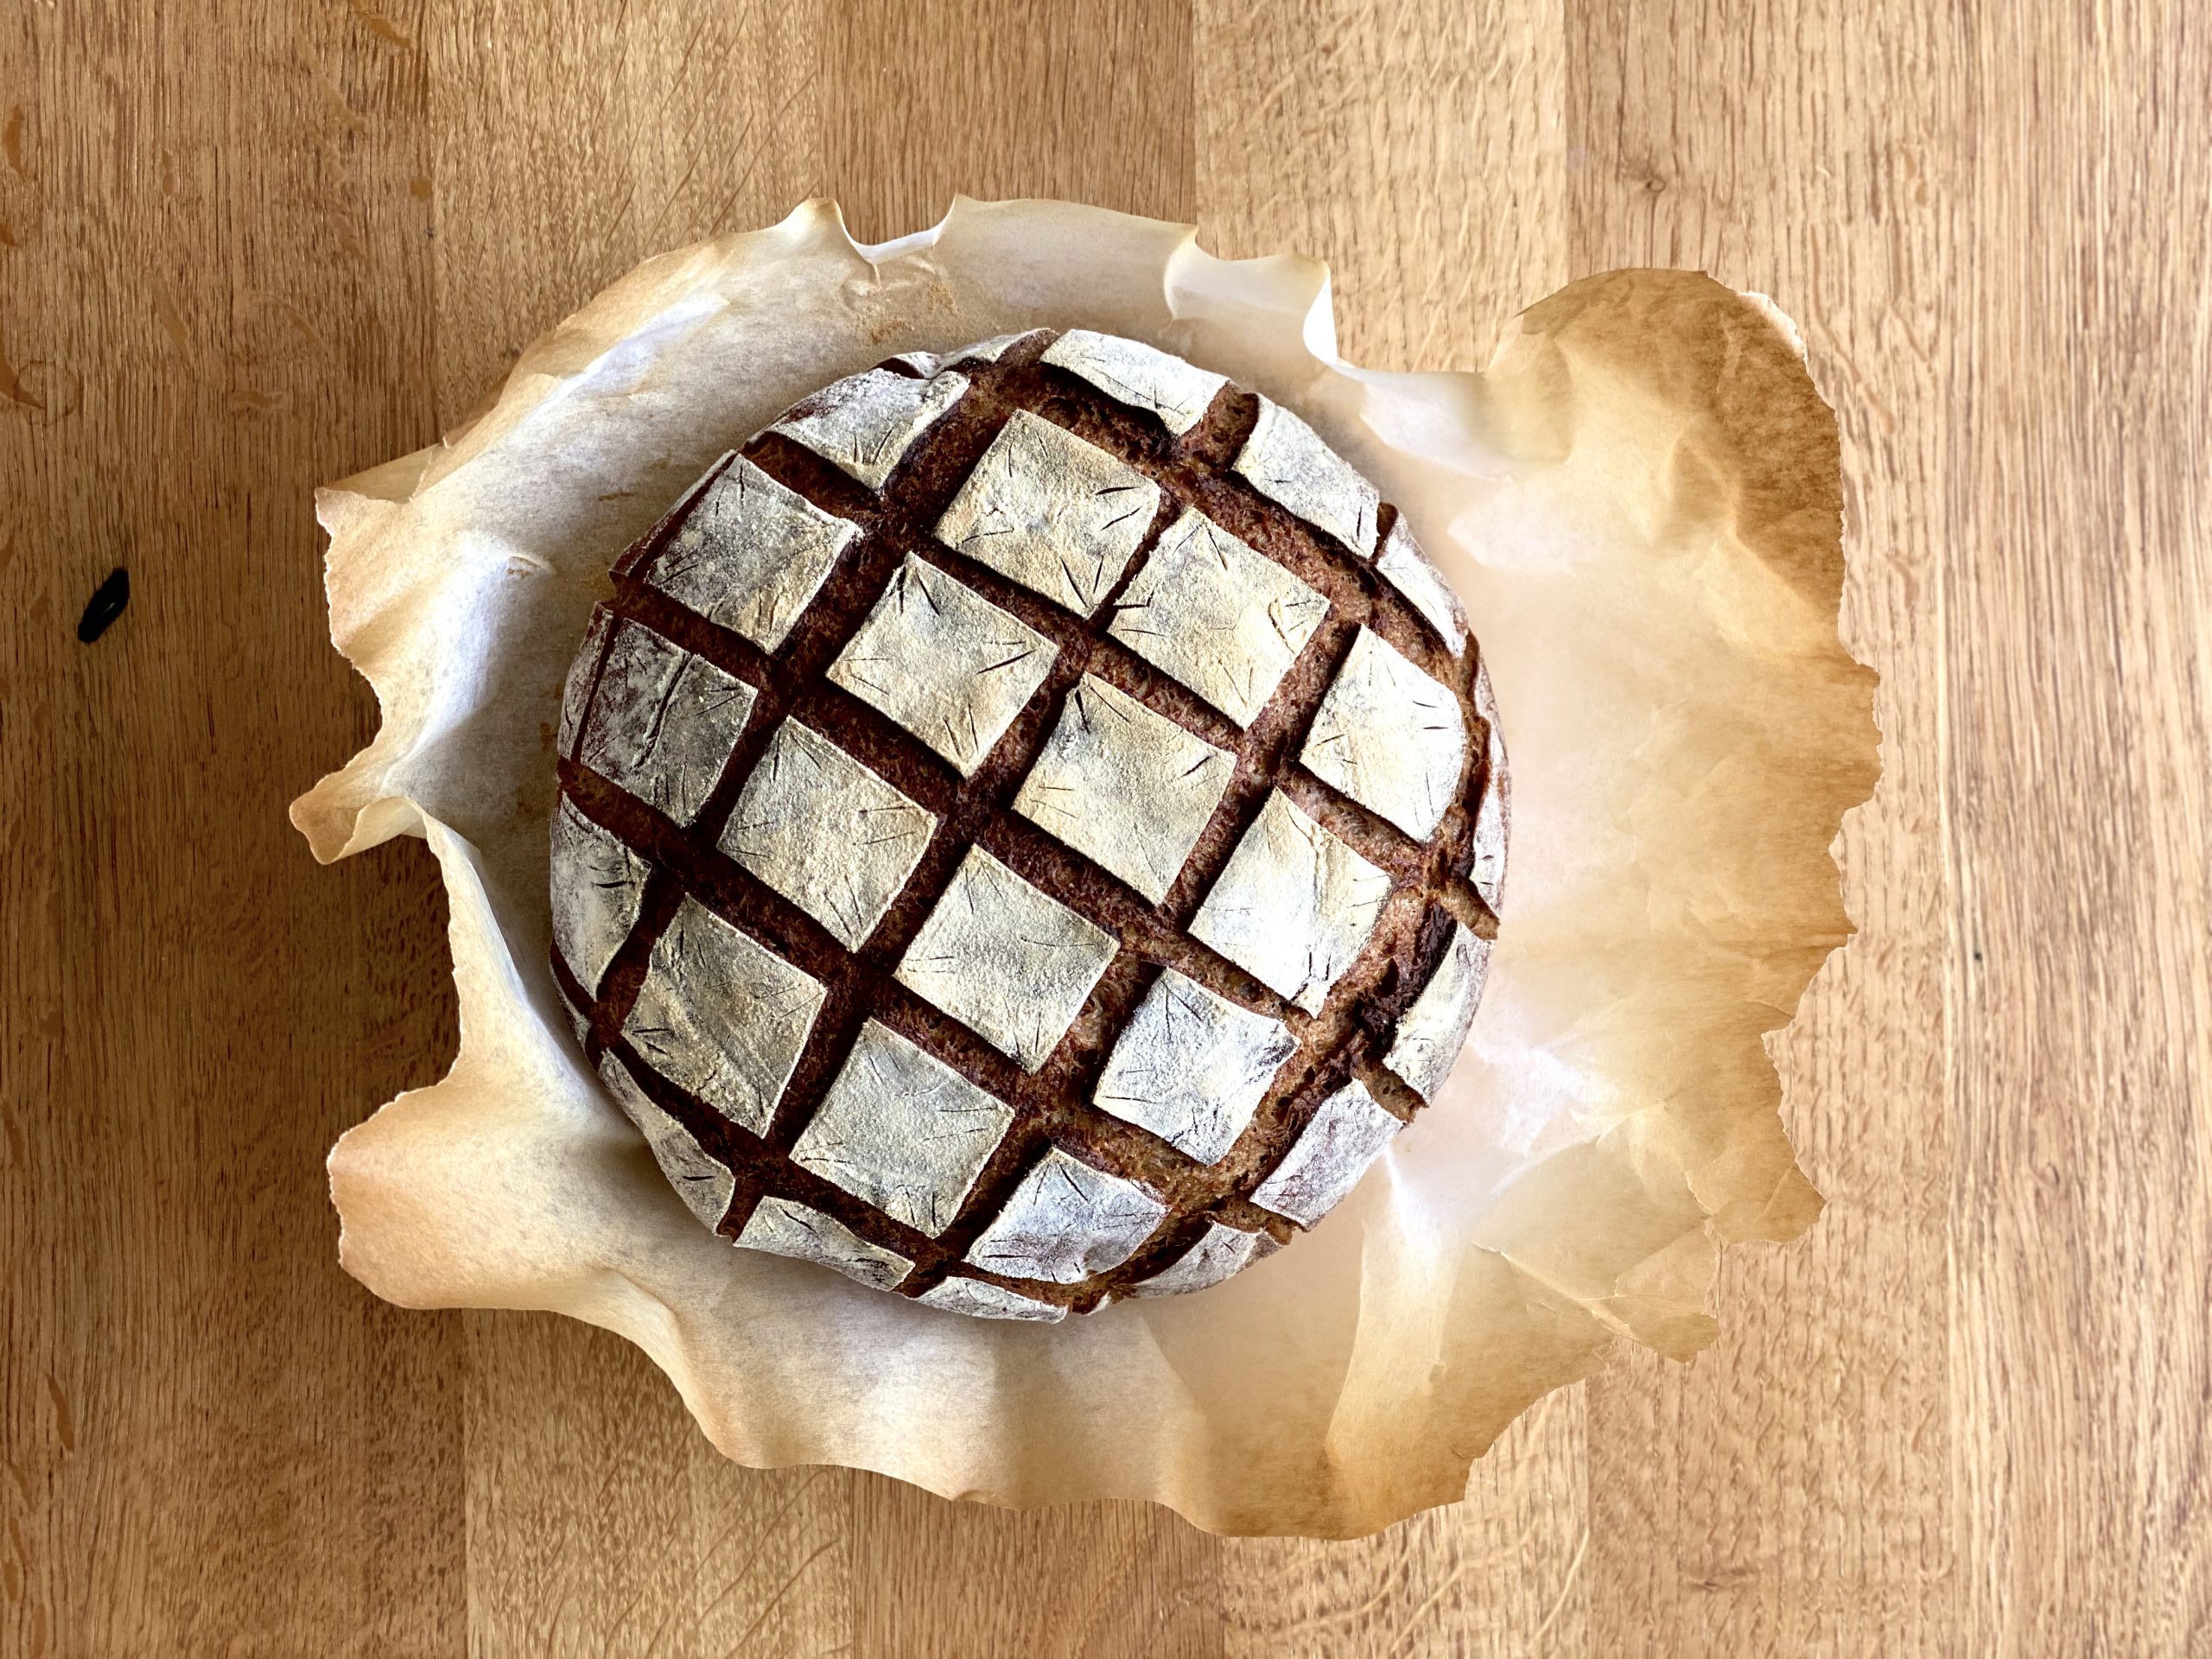
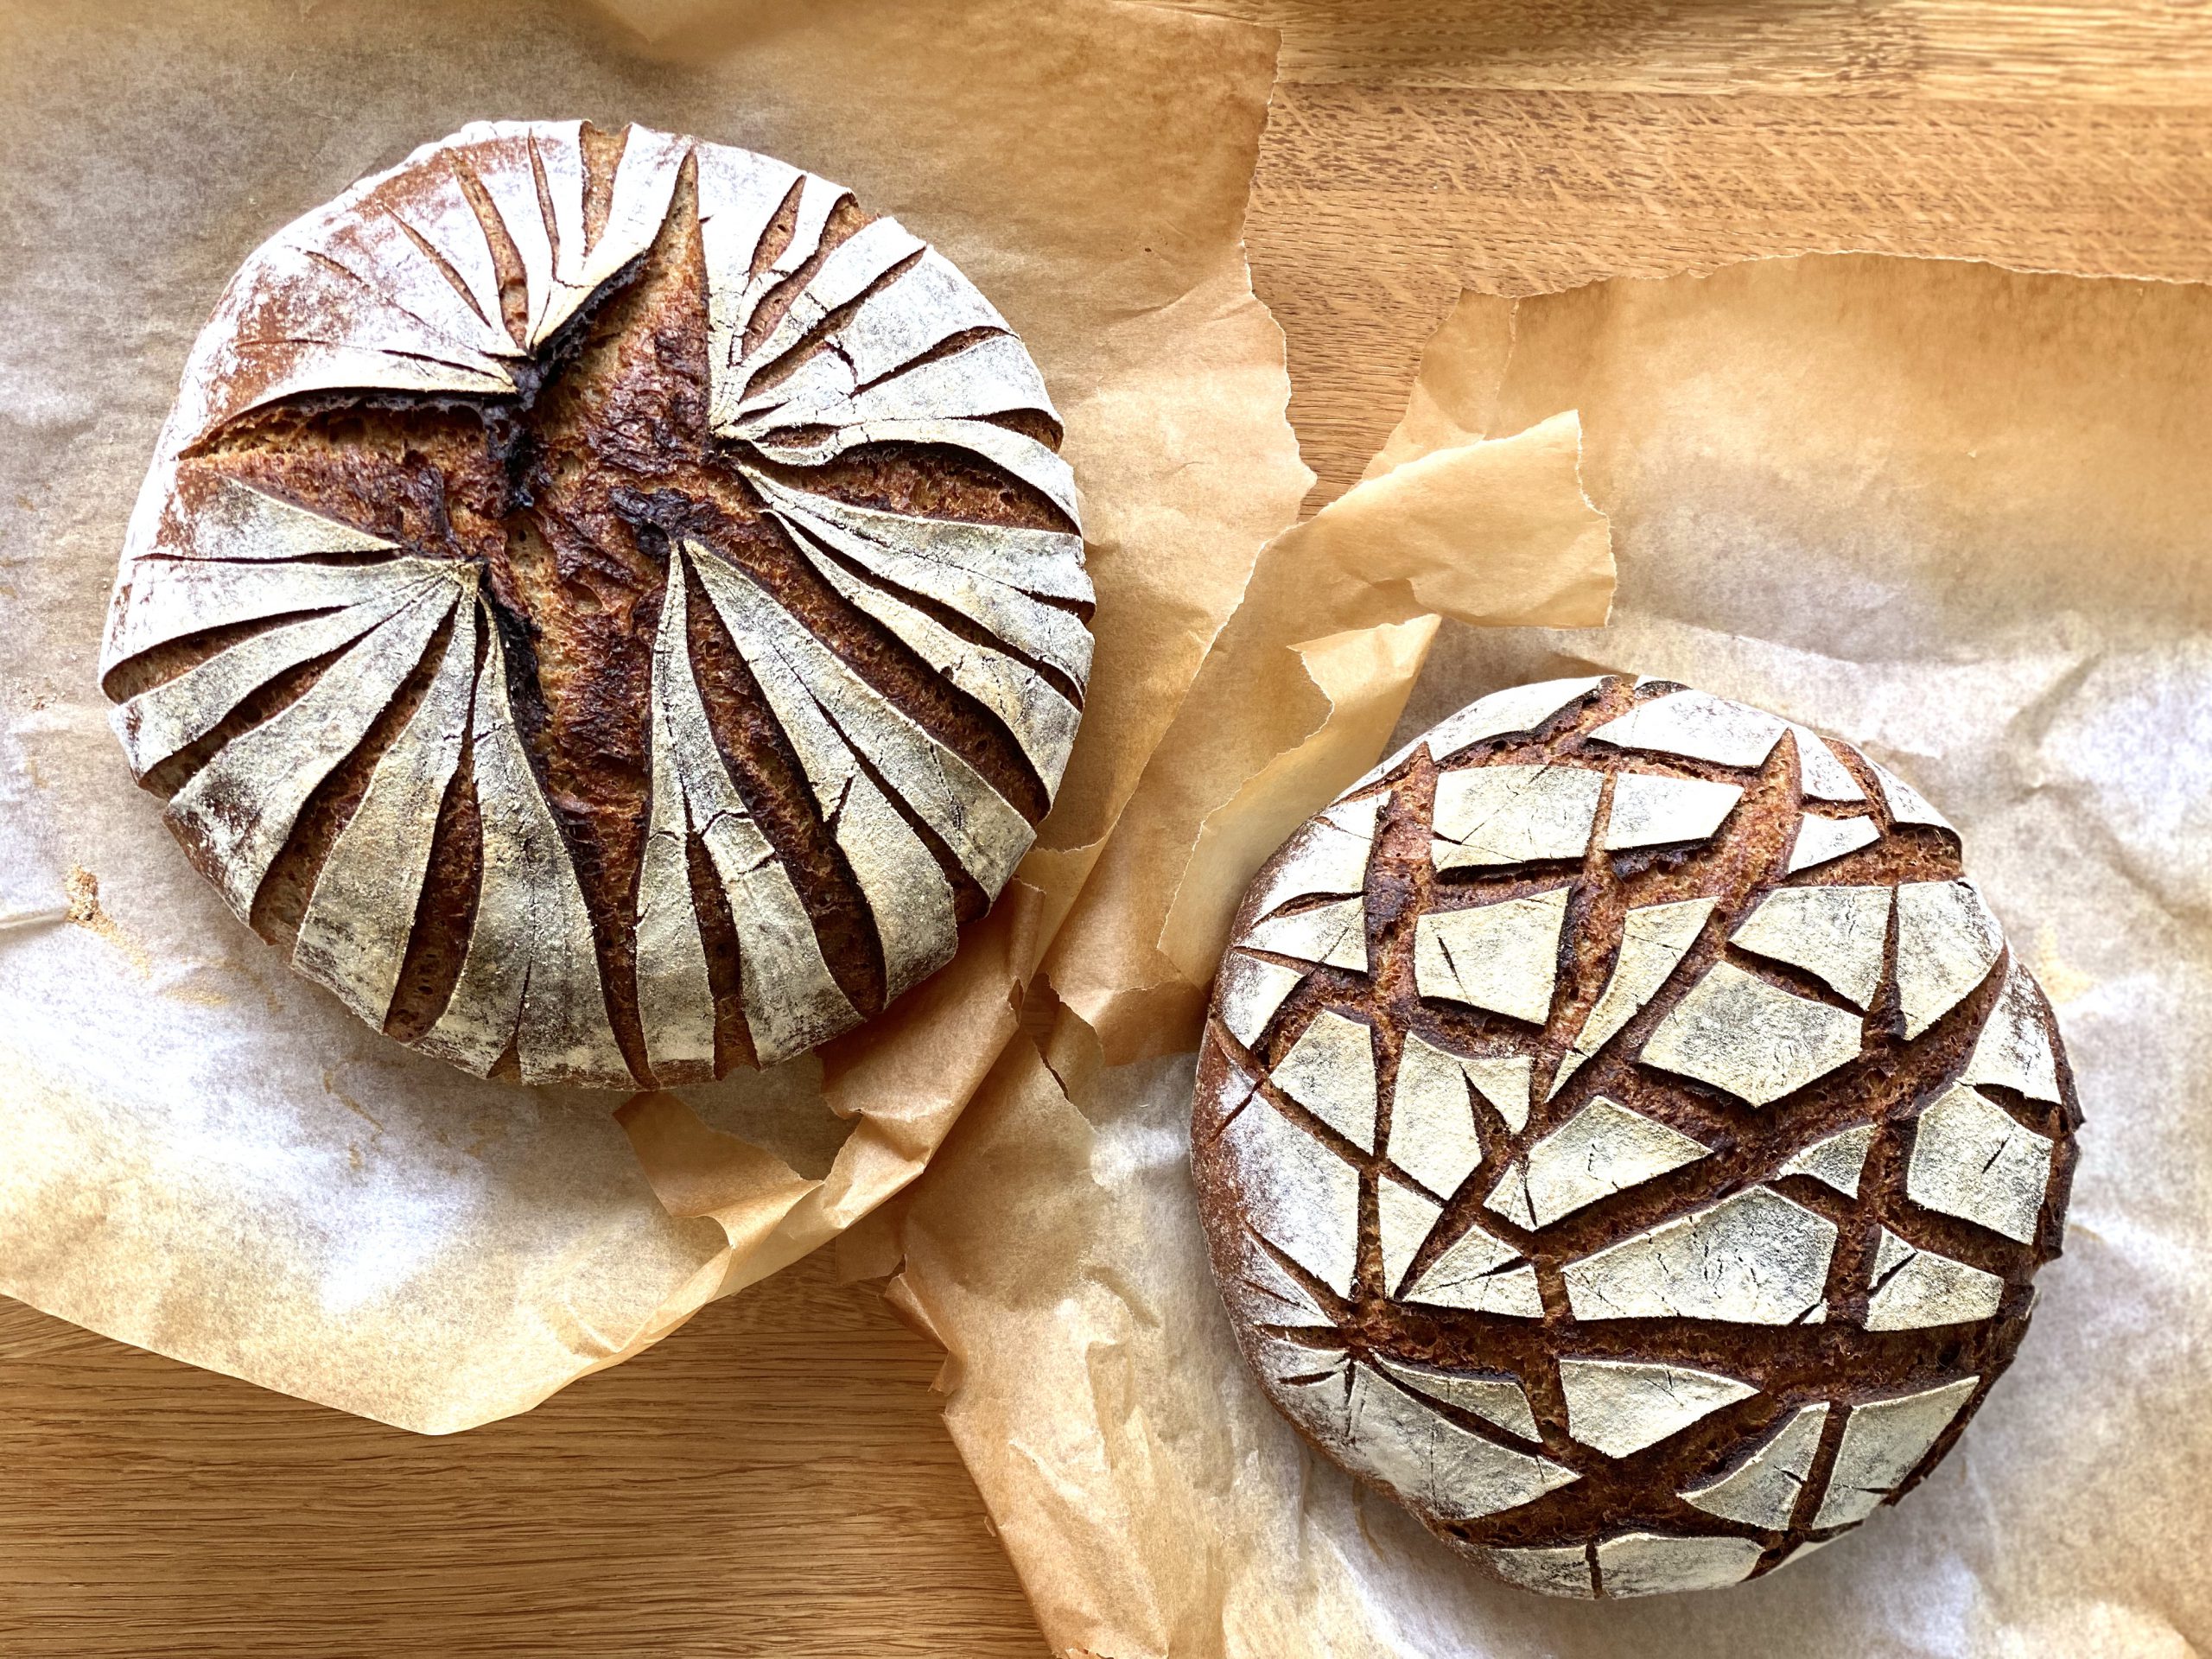
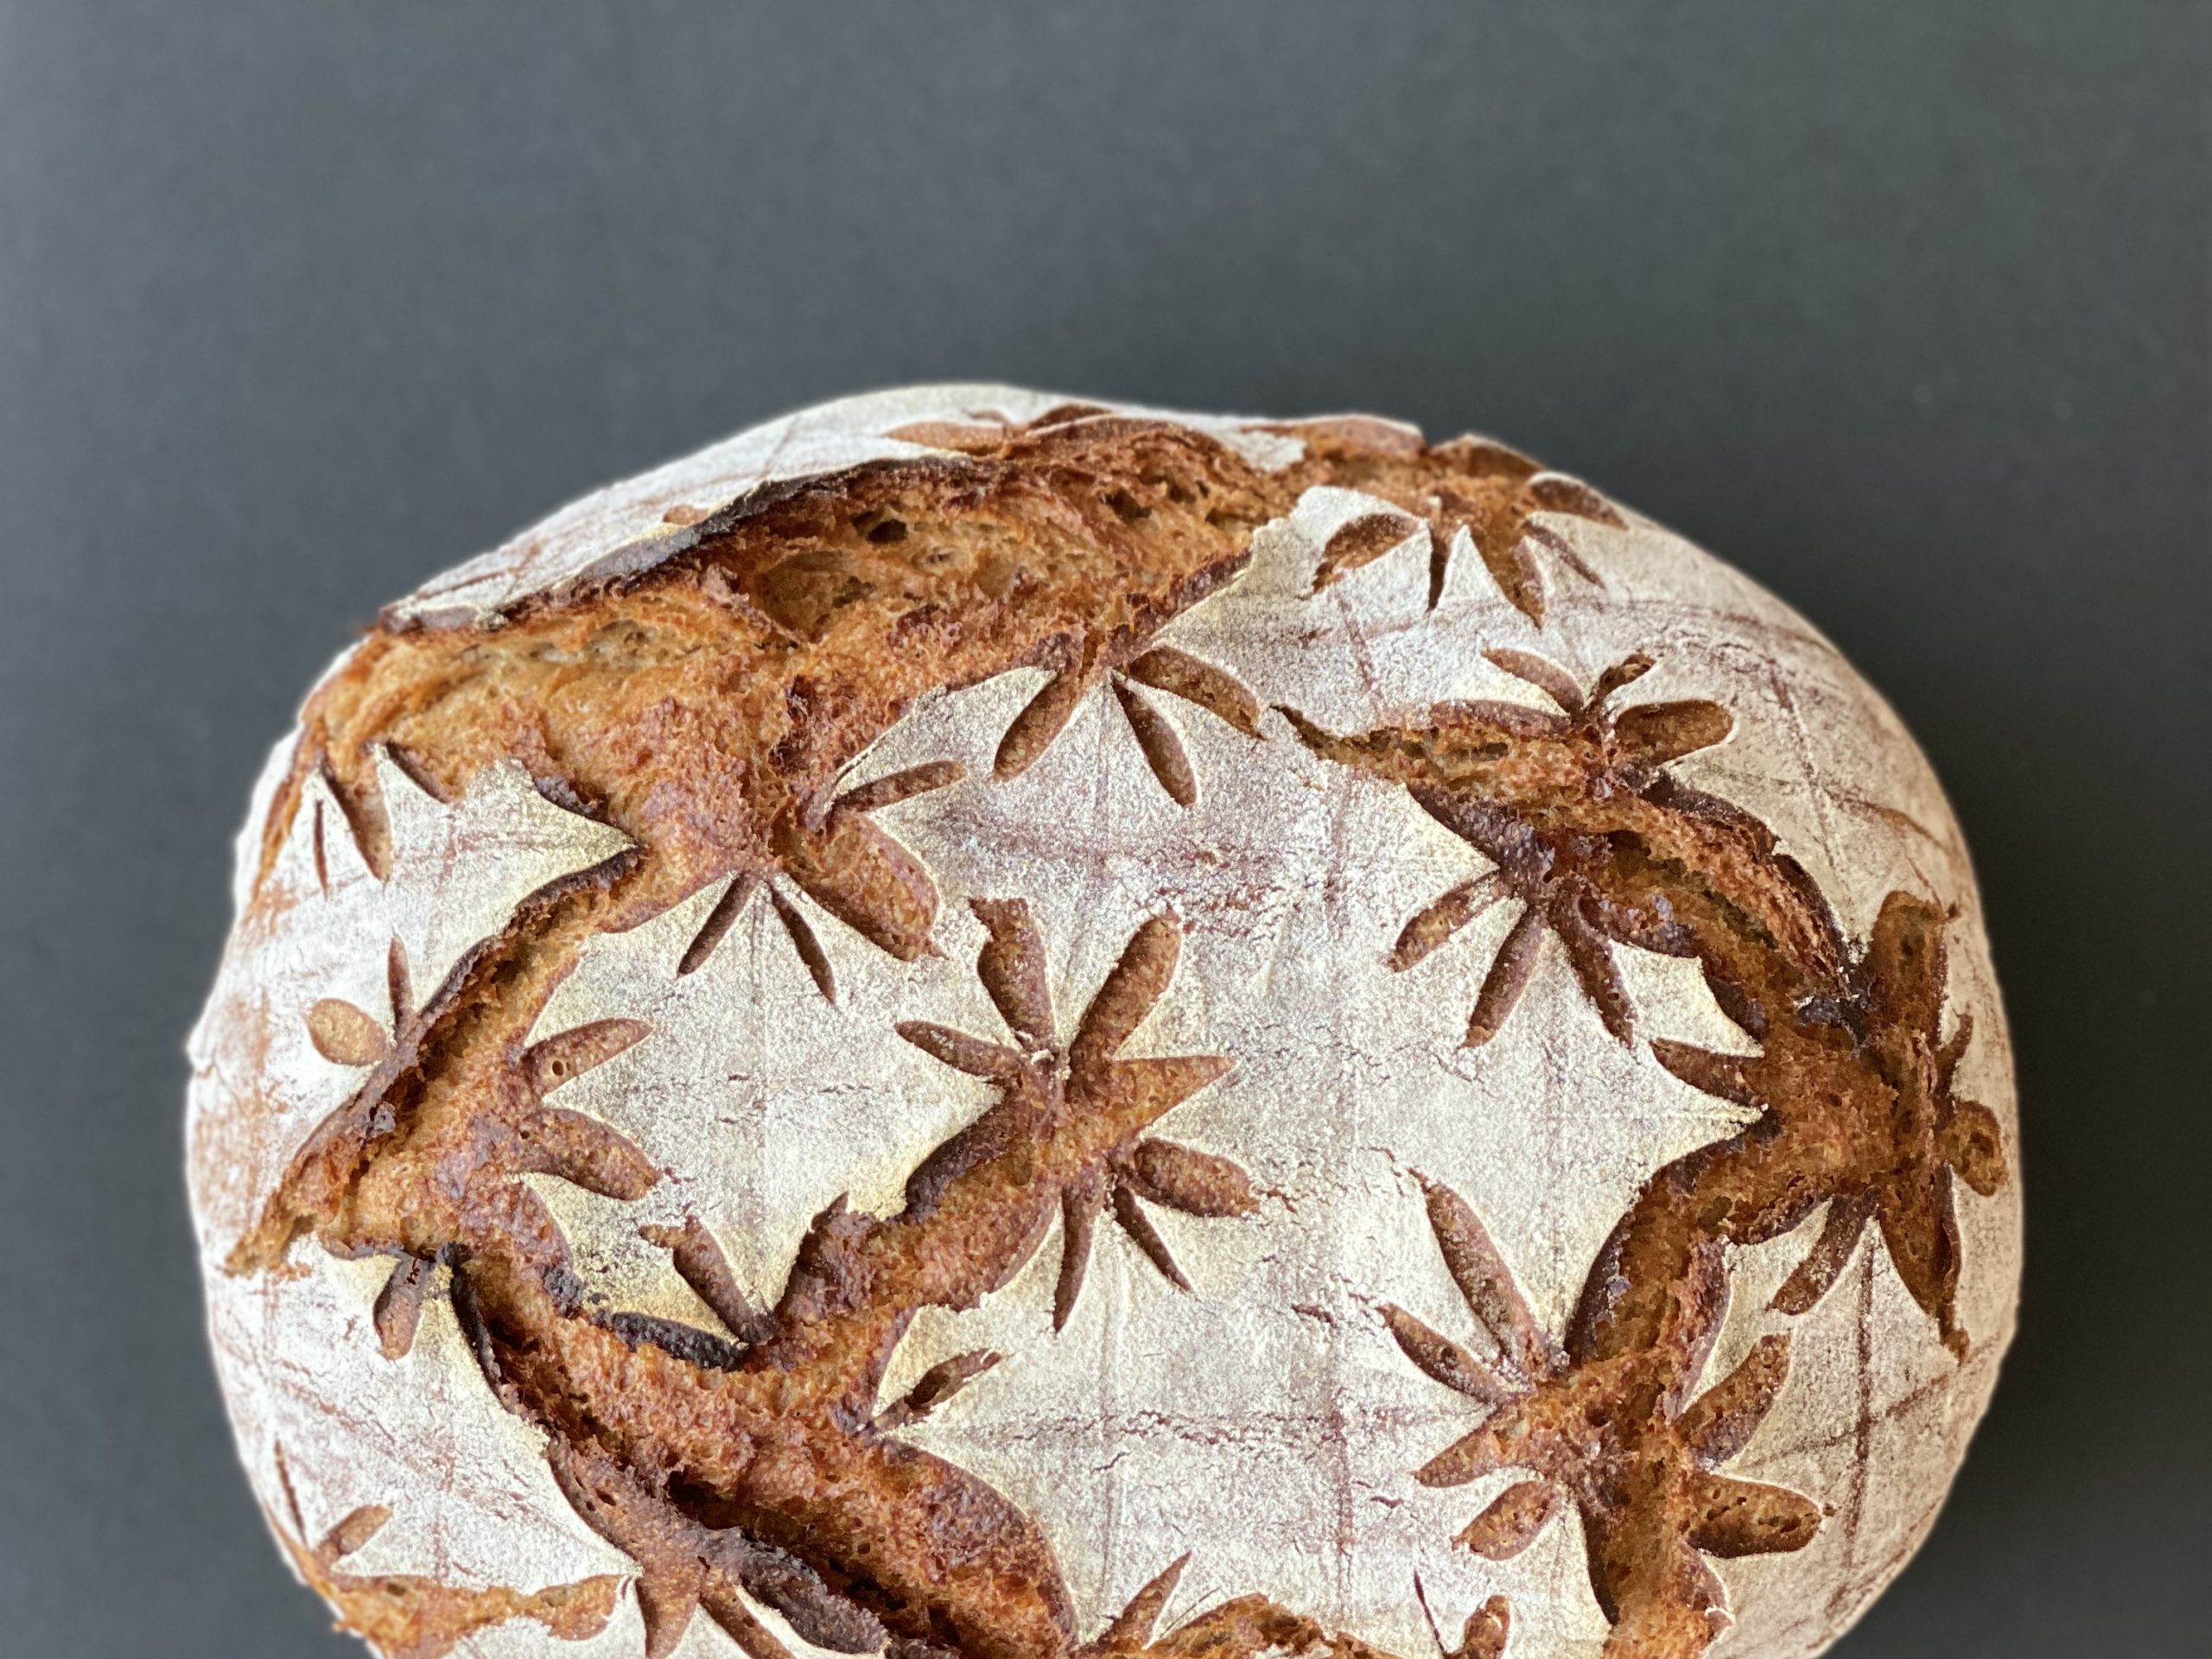
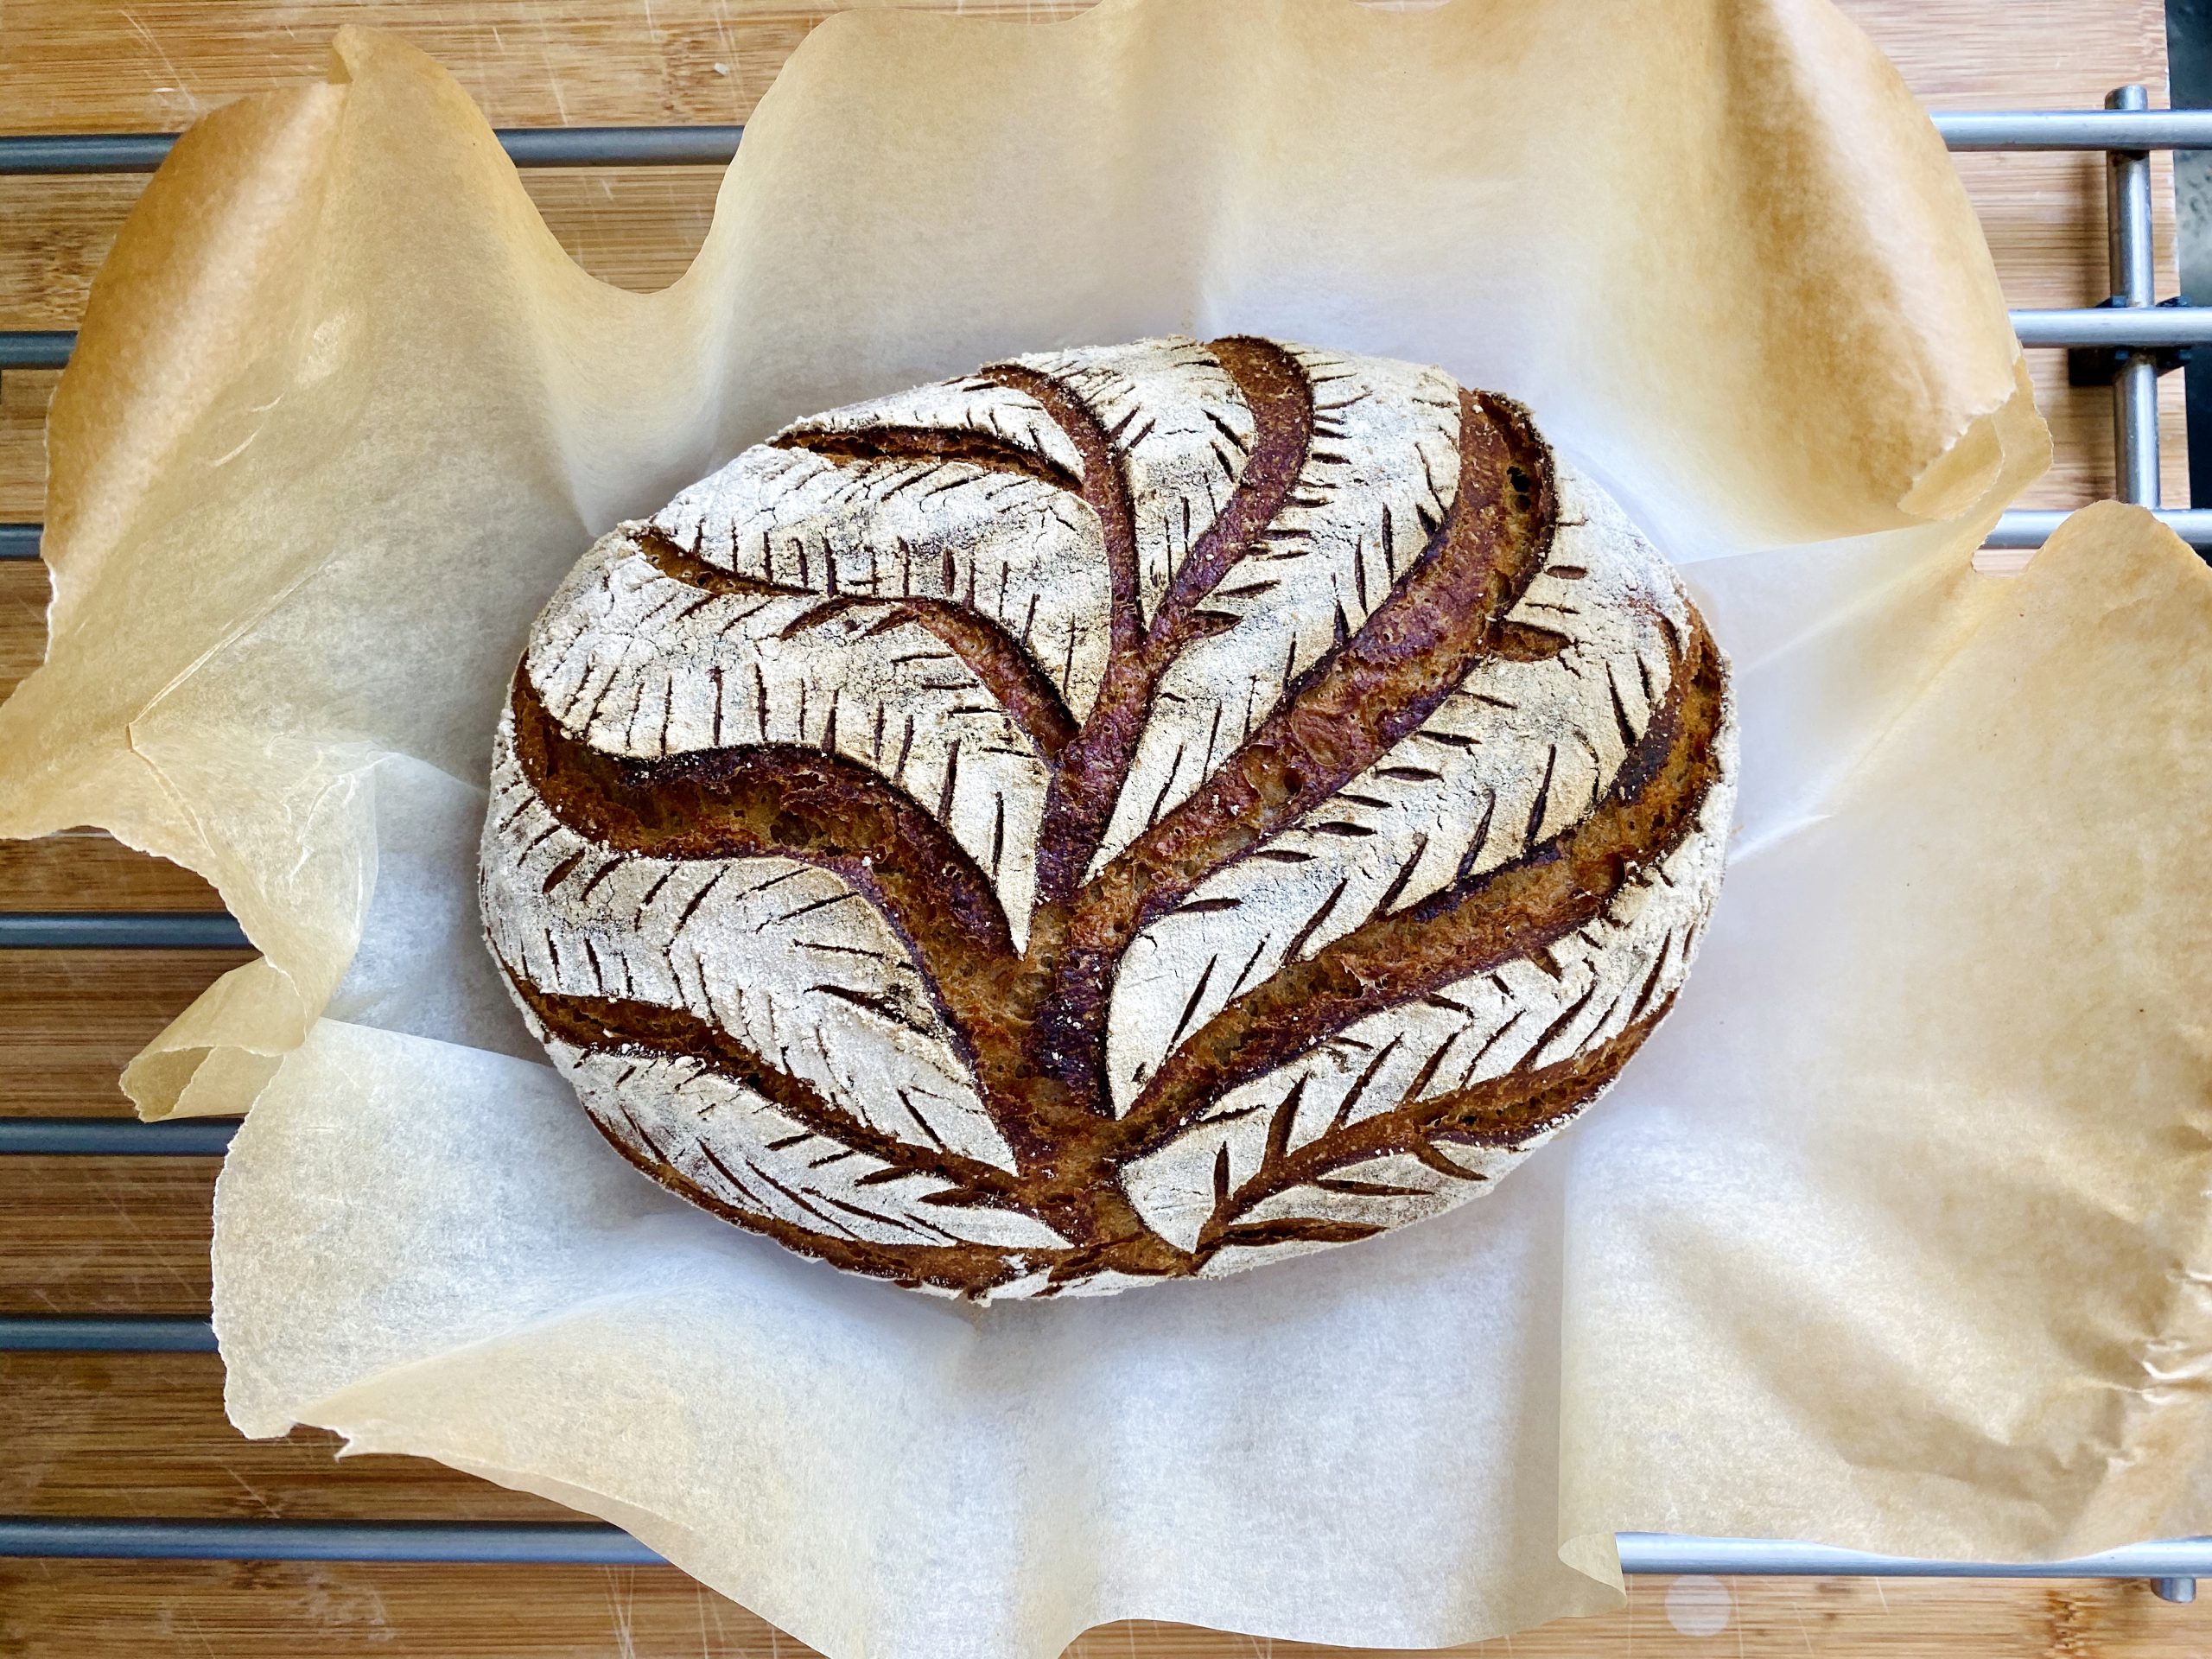
5. Einritzen.
Nimm deinen Laib aus dem Gärkorb und setze ihn auf ein Stück Backpapier. Gib ein wenig Mehl auf die Oberfläche des Laibs – und dann viel Spaß beim Einschneiden! Auf Roggenbroten kann man richtig schöne, kunstvolle Muster einschneiden. Da es kaum Ofentrieb gibt, bleibt das Muster meist gut erhalten. Noch besser funktioniert es, wenn der Laib kalt ist.
Nerd-Tipp: Benutze etwas Zahnseide, um dir vor dem Einschneiden die Linien zu markieren!
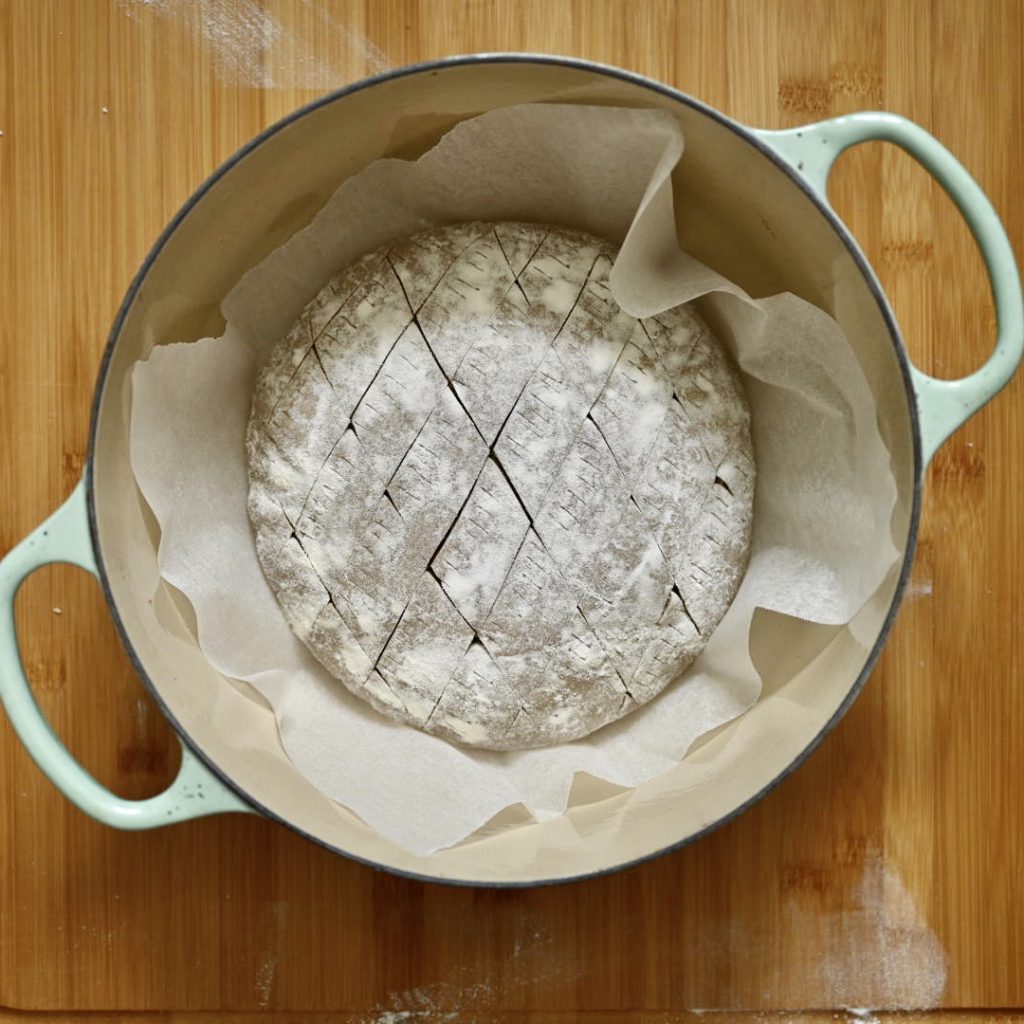
6. Backen
Heize deinen Backofen und deinen Dutch Oven auf 240°C (470°F) vor. Bemehle deinen Laib, ritze ihn ein und gib ihn in den Dutch Oven. Lass den Deckel in den ersten 15 Minuten des Backens drauf. Backe das Brot für 45 bis 50 Minuten.
Ich habe diesen Laib schon bis zu 10 Tage lang im Kühlschrank „retardiert“ (langsam gehen lassen) bevor ich ihn gebacken habe. Oft mache ich genug Teig für mehrere Brote auf einmal, forme sie und stelle sie dann in den Kühlschrank, bis ich frisches Brot brauche. Das ist so ein richtig fauler Backtrick, würde ich sagen 🙂


Wow I live this post , I’m going to try this tomorrow !
Thank you! Let me know how it goes!
Once i take it out of the fridge how long do i let it rest to bake ? Loving your website.
Thanks, Josie! No need to wait. Take it out of the fridge, score it and put it in the oven right away!
Eeeeek!! I’ve only just mixed it together and it seems so dense. I’m nervous but I’ll keep going. Maybe I was too ballsy thinking a rye mix could be my 5th loaf attempt!!
Yes, it’s a great dense, sticky mess! 😀 And that’s ok. Rye has very different properties than wheat, so it’ll never become as smooth and elastic. How did your loaf turn out? 🙂
Hi – I’m trying out the rye bread and the recipe is super easy, but we can’t find parchment paper (lockdown!) and so I”m baking it on a silicon mat on a tray. Do I need a tray with water to make steam? and should I adjust the temperature – 240C is very hot!
Super easy and tasty – but the crust burnt. Any suggestions?
I got pie weights to put under my loaves because they keep burning. Tonite will be my first time trying this trick. So we shall see.
Hi Benita!
I’m happy you like the rye bread! Do you use a Dutch oven? If yes, you don’t need extra water.
If you don’t use a Dutch oven, you should add some steam one way or another, like with a tray with water as you suggested.
Probably the 240C was too hot – try it next time with 230C and watch how the crust develops in the last 10 minutes of the bake. 240C works well for me and my oven, but every oven is different.
Let me know how it goes!
Nicola
Hi thanks for the recipe! I just started on the sourdough journey and really want to try out rye bread. The recipe seems easy to follow. A few questions – i dont have a Dutch oven is it ok if I divide the dough into half and bake it in a loaf tin with another inverted loaf tin on top? Also my oven can only go up to 220C…will it be ok if i bake it longer at this temp or is it not hot enough? Thanks!!
Dear Cherry,
I’ve never tried a setup with two loaf tins on top of each other. I’d be curious to see if it works!
You could also just use two loaf tins and bake two loaves side by side.
For the rye bread, the higher heat is usually better, but 220C might be alright still. Definitely bake it longer in that case. I like to wait until I get a dark crust, but not yet burnt.
Hope it works well for you! Let me know.
Happy baking
Nicola
I made a fruit & nut version of this loaf and it was DELICIOUS. After feeding my starter, I soaked 150g golden raisins + cranberries in water & toasted 50g walnuts. Once my starter was ready, I drained the fruit. I added the fruit & walnuts after combining the ingredients. The flavour of the Rye was perfect. We had it with blue cheese & mascarpone. 12/10 would recommend!
That’s such a great idea, Caite! Thanks for the detailed instructions, too.
I’m curious how long you prove in the fridge before baking? Does this lend itself well to an overnight cold proof and/or how does that impact the crumb?
Thanks for the recipe! Working on my first run through and I can’t wait to put this bad boy in the oven!!
Dear Jason,
yes, I always retard this loaf in the fridge overnight. And sometimes even for 3 to 4 days.
After 48 hours, the loaf is pretty sour, but I feel it loses sourness as it stays in the fridge longer.
As for the crumb, it loses some structure the longer it stays in the fridge, but it doesn’t matter much for this kind of rye bread.
Let me know how it goes!
Nicola
Thank you so much for this recipe. I made this bread several times and each time it came out sumptuous. I sometimes add caraway seeds, other times some dried grated orange peel.
I tend to add more water than your recipe even though it makes the handling more sticky. The higher hydration causes a better rise.
Happy eating.
I’m so happy to hear that, Marguerite! And you’re right: My doughs tends to be rather wet because of the Hong Kong heat and humidity, so probably all of my recipes are on the lower hydration side for bakers in other climates.
Happy baking!
Awesome…I went from wheat ( rye fed starter) to 50/50 rye wheat mix. You have just set my mind at ease regarding the oven rise😅 Thanks. For the valuable info.
Perfect! 🙂
One question, do you allow some proofing before it goes in the fridge, or do you stick it straight in after shaping
No, I usually don’t do any room temperature proofing before putting the loaf into the fridge, since it’ll spend a whole night in the fridge, which gives it enough time to finish proofing.
Hi , lovely easy recipe – I can’t wait to try it out! A question re the starter : do I need to use 100g rye sourdough starter or 100g white/brown flour sourdough starter? I’m assuming I need to use a rye sourdough starter, but I’m just making 100% sure. I have both types of starter, as I bake often, so I will feed both types of starter today, in preparation for making/baking your recipe tomorrow. Look forward to hearing from you soon. Kindest regards Nandine
Dear Nandine,
I’ve used both kinds of starter for this recipe, but usually, I use a 100% rye starter.
I’m curious, did you make this bread? How did it go?
Nicola
My dough is in bulk fermentation as I write this message. But I’m a little concerned. It’s been almost 2 hours and I do not see any change in the size of the dough. At what temperature do you ferment? I make 100% rye loaf bread on a regular basis and the first fermentation usually takes somewhere around 8-10 hours, so I was a little surprised when I read 3-4 hours. I used fresh starter. I’m a little puzzled. I’m thinking of increasing the hydration, as I am used to a wetter dough. I would really appreciate your thoughts. Thank you!
Hi Vardit,
first of, sorry for the late reply! How did your dough turn out?
You’re right, 3 to 4 hours is on the shorter side. It works best for me because my rye starter is quite strong and I live in a climate which is hot and humid throughout most of the year. Depending on your room temperature, humidity, starter strength and starter maturity, bulk fermentation could take longer. It’s best to look out for an almost doubling in volume. With this recipe, is better to err on the side of bulking “too long” than “too short”.
Hope this can help for your next bake!!
Happy baking
Nicola
Hi Nicola,
What is the max no. of hours i can cold retard the dough…i really love sour rye, but don’t wanna risk gluten rot.
Cheers.
HL
Dear HL,
sorry for the late reply! I’ve left the dough in the fridge for up to a week, no problem!
Let me know how it goes if you try it.
Nicola